Activity
Media
Mail art
Materials
Envelope of the student’s choice, magazine of the student’s choice (that they are prepared to destroy), one sheet of 8 1/2-x-11 in. paper of student’s choice, scissors, Scotch tape, glue sticks, markers, access to a photocopy machine and copy paper, and USPS postage
Download This Activity
About Open Studio
Designed by practicing artists, the Open Studio classroom activities aim to connect high school teachers and students with key ideas and issues in contemporary art. See all of the Open Studio activities.
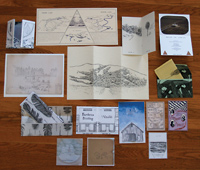
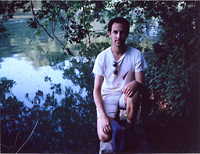
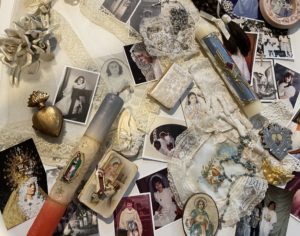
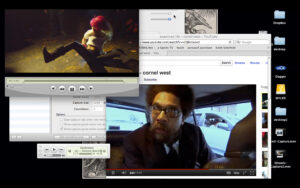
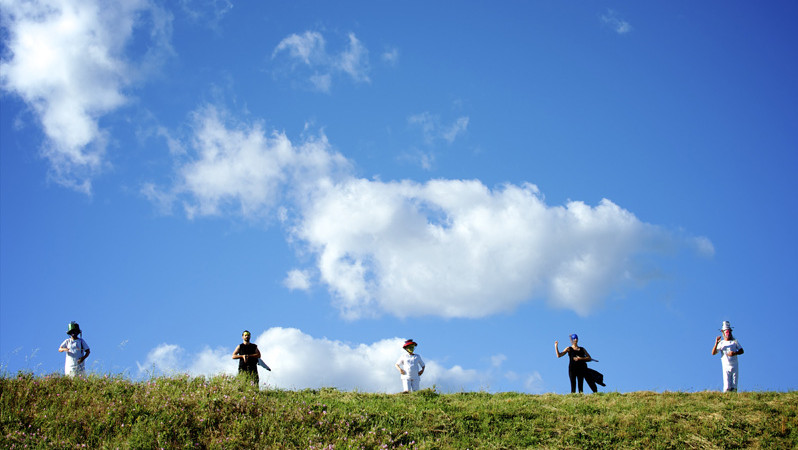
David Wilson, maps and invitations related to various gatherings and installations by the artist, 2006-13; © David Wilson
Assignment
Create a custom edition of envelopes
Have each student bring to class one envelope of his or her choice, one magazine of his or her choice (that they are prepared to destroy), and one piece of 8 1/2-x-11 in. paper of their choice. The teacher should be prepared to provide scissors, Scotch tape, glue sticks, some markers/sharpies, and access to a photocopy machine.
Instructions
Set the envelope to the side for a moment.
We will begin by creating collages on the sheets of 8 1/2-x-11 in. paper. To do this, you will need scissors, Scotch tape, and access to the assortment of magazines the class has brought in. Next, choose one collage “keyword.” This could be a color such as blue, gray, or yellow, or a visual element such as hands, hair, sky, animals, patterns, or any simple thing that you think you could find repeated imagery of in the magazines. The more simple and broad the collage keyword is, the more potential imagery you will be able to find in the magazines. You will have one minute to pick your keyword. Remember, using the suggested keywords is totally cool.
Once everyone in the class has picked a keyword, your teacher will assign a set period of time (depending how much time is allotted to this project . . . 10 minutes, 15 minutes, 20 minutes) to search through the magazines, cutting out images that relate to your keyword. For example, if your keyword is “yellow,” you will cut out any pieces of yellow that you find (it could be a yellow letter, or part of someone’s outfit that is yellow). Or if your keyword is “sky,” you will cut out any sections of sky that you find. Share the magazine supply with your classmates to keep the search fresh. You are going to want to gather enough imagery to fill an 8 1/2-x-11 in. piece of paper front and back, so this process should not be too precious; you’ll need a good amount of material to work with.
After this set period of image-gathering time ends, your teacher will give you another block of time in which to create your collage. Arrange the images you gathered so that they cover your 8 1/2-x-11 in. piece of paper on the front and on the back. Depending on how much material you have, you can either go for complete coverage or try to create some kind of pattern across the whole page (e.g., polka dots). Feel free to cut the imagery into any shapes you’d like. Try to create a collage that is interesting looking.
Next, each student in the class will follow the teacher to the school’s copy machine and submit his or her collage to the teacher, who will make three photocopies of it. The teacher may create these copies on standard white copy paper, or on a card stock if it’s available, or on a colored paper of the teacher’s choosing. When it is your turn to present your collage to the teacher, say these words: “Will you please make three photocopies of this for me? I’d really appreciate it.” Make eye contact; it’s good form when asking for something. (Ideally the teacher will use the “two-sided” copier setting, so that both front and back will be copied on the same sheet.)
Okay, so now walk back to your class with your original collage and three photocopy prints.
Now it’s time to make your envelopes. Take the envelope that you brought, and carefully un-glue it and open it up so that is fully unfolded in some kind of cross shape. Be careful not to rip it when you’re opening it up. Once you have the envelope unfolded, lay it flat and trace its outline with a marker onto each of your collages, including the original collage. This unfolded envelope will act as a template you can use to create new envelopes from your collages. If your unfolded envelope turns out to be larger than the 8 1/2-x-11 in. page on which your collage was created, you will need to borrow someone else’s envelope template.
After you have cut out new envelopes from your collages, fold each cut-out into the shape of the original envelope. First fold in the side flaps, then fold up the bottom flap, then fold down the top flap. Once you’ve seen how the new envelope will look and made sure it is coming together roughly like your original envelope, unfold the top and bottom but leave the side flaps folded in. Then apply glue with a glue stick to the outside faces of the side flaps. Fold the bottom up to meet the glue-covered side flaps, and press firmly so that the bottom flap adheres to them. Then set the envelope aside to dry and begin working on your next envelope. You should now have a little workflow going as you assemble all of your envelopes.
So now you have made an artist envelope edition, and we can correspond.
Using one of your envelopes, I invite you to enter into an artist correspondence project called The Possible. The artist Kori Girard and I have been inviting artists into a mail art correspondence, and I think you might enjoy getting in the mix. Here’s a blog where you can see what folks have been sending back and forth: https://thepossible-correspondence.tumblr.com/.
To participate in this correspondence, simply write this address on one of your envelopes (you choose if you want to send the original collage or the photocopy):
DESI
c/o BAMPFA artlab
2120 Oxford St.
Berkeley, CA 94720
Make sure you choose a writing utensil that shows up on your envelope. If you made something really dark, you might need to write it with a white-out marker, or if it’s too hard to see anything, you could attach a white label and write the address on that. As for what you put inside the envelope, put anything you’d like . . . perhaps a drawing, a photo, a letter saying some things about yourself, some random scraps of stuff that are in your desk . . . anything.
If you’d like to answer a question in your letter, you could make a list of your favorite music/books/artists/movies, or perhaps a list of things that you like to do or would like to learn. I am interested in learning about what gets you inspired and excited . . . it could be sleeping, it could be mountain climbing, it could be Lil Wayne, it could be Stravinsky. It’s yours, whatever it is. Give it some thought, but don’t overthink it.
You will need to put the proper postage on the envelope. If you added a lot of layers to your collage, it might require more than one standard stamp. You will need to go to the post office and have them tell you how much postage is required. Then drop your envelope in the mail and let it fly.
If you send one of your letters to The Possible, I will send you a letter back. Be sure to include your return address. This letter that I send back will include a new address where you can send something to another person who is participating . . . it could be another artist, or a student, or someone else. And with that, you’ll be part of an artists’ correspondence.
With your remaining envelopes, I encourage you to send at least one other letter to someone else of your choosing. Getting mail, especially personal and special mail, is a gigantic pleasure and offers someone a rare treat. It’s a simple way to add some inspiration to someone’s daily experience.
Hope to see you in the mail.
Truly,
David Wilson